Tutorial on how to use the H.P.A. System
In the following video we show you how to use the H.P.A. system (Held protector adjustment) correctly in a Held motorcycle jacket.
Use over arm:
Use via “inner security” zipper:
Tutorial for activating the eVest or eVest Clip-in
In the following video we show you how to activate your eVest or eVest Clip-in.
Tutorial for updating the In&box
In the following video we show you how to update your In&box correctly.
- In&box
Tutorial for changing the cartridge of the eVest or eVest Clip-in
In the following video we show you how to change the cartridge of your eVest or eVest Clip-in correctly.
Tutorial for the installation of the eVest Clip-in in the Slade II
In the following video we show you how to install the eVest Clip-in correctly into the Slade II leather suit.
EVEST / EVEST CLIP-IN / EVEST PRO SERVICE
On the following page you will find all information about our service offer for our eVest models
Tutorial on the correct use of 2in1 technology
In the following video we show you how to use the 2in1 technology for bloves correctly, using the Sambia 2in1 as an example.
Tutorial on the correct use of over&under technology
In the following video we show you how to use the over&under technology correctly, using the Luca Telli textile combination as an example.
Tutorial for the installation of Clip-in products
In the following video we show you how to correctly install Clip-in products in a compatible Held jacket and/or trousers.
Tutorial on the correct installation of the Held Drinkbag
In the following video, we show you how to properly install the drinkbag in your textile jacket using the Atacama Top as an example.
- Drinkbag (Art. 41941)
Tutorial on the correct installation of the Held Drinkbag
In the following video we show you how to install the drinkbag correctly using the Race-Evo II leather suit as an example.
- Drinkbag (Art. 41941)
Tutorial for the installation of the H.L.S. Set (Art. 91995)
In the following video we show you how to install our H.L.S. set correctly in our products with H.L.S. technology.
Note: Powerbank is not included!
The H.L.S. set can be retrofitted to the following Held products:
- Atacama Top
- Carese Evo
- 4-Touring II
- Imola ST
- Tivola ST
- Traveller Top
- Yoshima
Tutorial for the installation of the one-piece chest protector in a leather suit (Art. 9280)
In the following video we show you how to install our one-piece chest protector correctly in our products with velcro for our retro-fittable chest protector using the example of our Race-Evo II leather suit.
Tutorial for the installation of the one-piece chest protector in our Sakari back protector (Art. 9280)
In the following video we show you how to install our one-piece chest protector correctly into our Sakari back protector.
Tutorial for the installation of the two-piece chest protector (Art. 9784)
In the following video we show you how to install our two-piece chest protector correctly in our products with Velcro for our retro-fittable chest protector.
Tutorial on the correct use of the Held Flexmount line
In the following video we show you how to attach the different Flexmount bags to the Flexmount Backpack.
- Flexmount Backpack (Art. 42290)
- Flexmount Belt (Art. 42200)
- Flexmount Bag M (Art. 42202)
- Flexmount Bag S (Art. 42201)
Tutorial for changing the air cartridge of an Air Vest (Art. 6448)
In the following video we show you how to replace the airbag cartridge of our mechanical lanyard operated airbag vests.
- Air Vest (Art. 6449)
- Air Vest II (Art. 6894)
- Clip-in Air Vest (Art. 6893)
Note: Depending on the size of the vest, a 60cc (S-L) or 100cc (XL, B-L, B-XL) cartridge must be used.
TUTORIAL HOW TO ADJUST A KNEE PROTECTOR
In the following video we show you how to adjust the height of the knee protectors.
Installation in Matata II:
– Knee protector SAS-TEC
1. THE “MAGNET SYSTEM” FROM HELD
The all-rounder for all motorcycle models with steel tanks
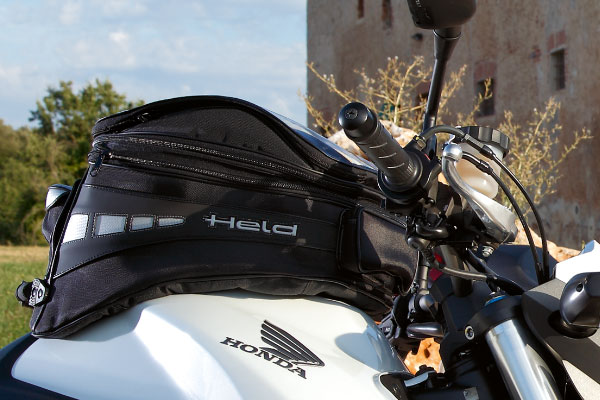
Powerful magnets combined with a specially developed anti-slip base plate result in a universally applicable fastening system that has proven itself in practice for years.
Advantages
Quick attachment and removal of the tank bag thanks to extra strong magnets for extremely flexible handling.
Use
We offer various tank bag models that have been specially developed for flat and curved motorcycle tanks.
This is how it works:
Step 1: Remove sand and dirt from the steel tank with a soft cloth.
Step 2: Place the tank bag with magnetic system on top and attach the steering head strap. That’s it!
2. THE HELD “BURDOCK SYSTEM”
Maximum flexibility thanks to Velcro, for all motorcycles.
For motorcycles without a tank ring or a non-metallic tank. The high-quality burdock base plate, combined with steering head fastening, allows luggage to be attached to the motorcycle securely, flexibly and without annoying straps.
Advantages
Uncomplicated attaching and detaching of tank bags thanks to the burdock system.
Use
We offer you different tank bag models, suitable for almost all motorcycle tank shapes. Suitable for all motorcycle models. Particularly suitable for motorcycles that do not have a tank ring or metal tank.
This is how it works:
Step 1: Remove the seat and attach the burdock adapter plate to the body once.
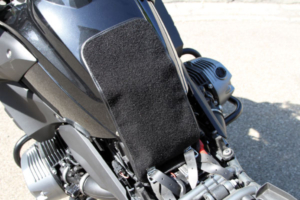
Step 2: Refit the seat.
Step 3: Put on the tank bag, fasten the steering head strap and tighten. That’s it!
3. THE “BELT SYSTEM” FROM HELD
 Reliable and secure – for 25 years.
A universal fastening option for extremely unusual tank shapes or for long-term and secure fastening of rear bags. With the “strap system” you are always “safe”.
Advantages
Secure hold thanks to strap fastening, which can be easily attached to the tank or under the seat. This companion won’t let you down, even at high speeds.
Use
We offer you our tank bag Art. 4104 with straps for an extremely unusual tank shape. Proven in practice/handling and fastening for 25 years. That is why only the “strap system” is used for our rear bags.
4. THE “CLICK-SYSTEM
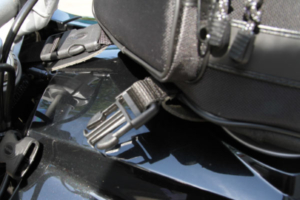
![]() A universal and quick fastening system that is used to secure the leather rear pannier. A secure hold is guaranteed by the click plate and the spacer protects the bag from contact with the exhaust or tires.
A universal and quick fastening system that is used to secure the leather rear pannier. A secure hold is guaranteed by the click plate and the spacer protects the bag from contact with the exhaust or tires.
Advantages
The simple attachment of the rear bag using metal quick-release fasteners provides a secure hold while riding.
Use
We offer you different rear bags for your chopper in various shapes and sizes for optimum adaptation to your machine.
This is how it works:
Step 1: Select the precisely adapted base plate for your motorcycle and attach it under the seat.
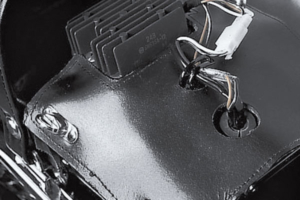
Step 2: The base plate can now always remain mounted under the seat.
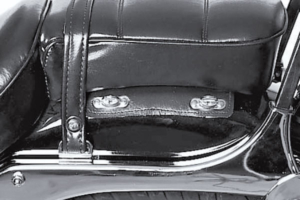
Step 3: Select your saddlebag with click system from our wide range.
Click it in, close the twist lock…
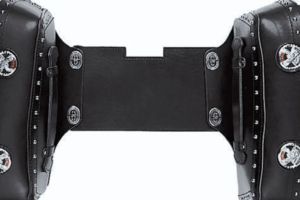
Step 4: Secure with locking pin (item 4720) and lock (item 4721 or 4725). Secure the lashing cord carefully. Done!
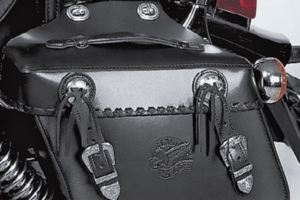
Step 1b: Use with spacers: Using spacers offers a very simple but effective way of fastening.
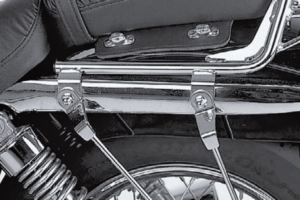
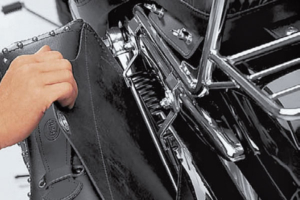
Step 2b: Use with spacers: Hook the rear compartment of the saddlebag onto the spacer from below, pull up the saddlebag, attach the twist lock of the base plate. Secure with locking pin (Art. 4720) and lock (Art. 4721 or 4725). Done!
QUESTIONS ABOUT OUR PRODUCTS?
You can also find all info in the Held App
Or visit us on social media
Newsletter registration
QUESTIONS ABOUT OUR PRODUCTS?
You can also find all info in the Held App
Or visit us on social media


